13254 Country Ridge Dr, Germantown, MD 20874, United State
E-mail us: jlmhandymanservices6@gmail.com
24 Hour Service - 7 Days a Week

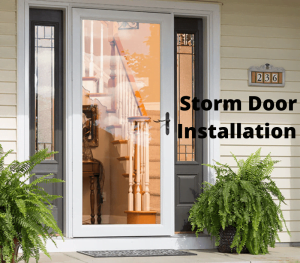
Storm door installation is a simple yet impactful home improvement project that offers numerous benefits, including heightened security and improved energy efficiency.
By following the right steps, you can enhance your home’s functionality and aesthetics.
In this comprehensive guide to storm door installation, we will walk you through the process in six easy steps.
Storm doors serve as an additional layer of protection for your home, shielding it from the elements and potential intruders.
They also contribute to energy efficiency by reducing drafts and heat loss.
With storm doors, you can enjoy improved insulation, lower energy bills, and increased comfort within your home.
Additionally, they provide an opportunity to enhance curb appeal, adding charm and elegance to your entryway.
Choosing the right storm door is crucial for a successful installation.
Consider factors such as material, design, and features that align with your needs.
Decide between full-view, self-storing, or ventilating storm doors based on your preferences and climate.
Accurate measurements of your door opening are essential to ensure a proper fit.
Take note of the required dimensions, including width, height, and thickness, and choose a storm door accordingly.
Before installing your storm door, prepare the entryway by inspecting your existing door and frame for any damage or necessary repairs.
Clear the area of any obstructions, ensuring a smooth installation process.
Gather the necessary tools, such as a tape measure, drill, screwdriver, and shims, to assist you during the installation.
Step 1: Remove the existing door, if applicable, by unscrewing the hinges and carefully lifting it out of the frame.
Step 2: Place the storm door frame in the opening and ensure it is level and plumb.
Adjust as needed using shims.
Step 3: Attach the frame to the door jamb securely, driving screws through the frame and into the framing.
Step 4: Align the hinges of the storm door with the frame and attach them using screws.
Make sure the door swings smoothly.
Step 5: Install the door handle, latch, and any additional hardware according to the manufacturer’s instructions.
Step 6: Adjust the door’s operation, ensuring it opens and closes smoothly.
Check the weatherstripping for a tight seal.
Regular maintenance is key to keeping your storm door in optimal condition.
Clean the door and glass panels periodically using mild soap and water.
Inspect the door’s hardware, including hinges and locks, for any signs of wear or damage.
Lubricate moving parts to ensure smooth operation.
Check the weather stripping and replace it if worn or damaged to maintain energy efficiency.
By following these simple steps for storm door installation, you can enhance security, energy efficiency, and the overall appeal of your home.
Enjoy the benefits of this valuable home improvement project.
If you need a storm door installed by a professional call JLM Handyman Services the #1 handyman in the Germantown, MD area
for more information call Jose At 240-501-0766
For more information about JLM Handyman Services Please ClICK HERE
Please Subscribe To My Youtube Channel CLICK HERE
Check out My Google reviews below.