13254 Country Ridge Dr, Germantown, MD 20874, United State
E-mail us: jlmhandymanservices6@gmail.com
24 Hour Service - 7 Days a Week

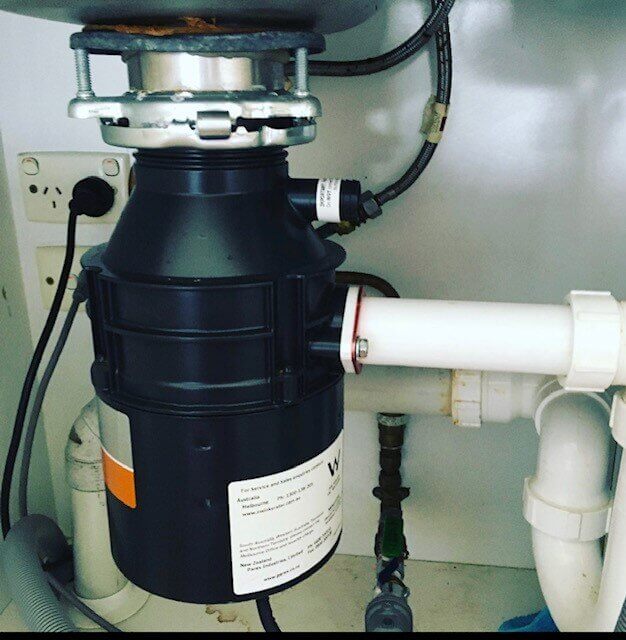
Installing a garbage disposal in your kitchen can greatly simplify your daily cleanup routine and help reduce waste. While it may seem like a daunting task, with the right tools and a little know-how, you can easily install a garbage disposal yourself. In this article, we will provide you with a step-by-step guide on how to install a garbage disposal, ensuring a smooth and successful installation process.

I. Gather the Necessary Tools and Materials:
Before you begin the installation process, make sure you have the following tools and materials on hand:
– Garbage disposal unit
– Mounting hardware
– Plumber’s putty
– Screwdriver
– Adjustable wrench
– Hacksaw
– Electrical cord and wire connectors
– Bucket
– Towel or rag
II. Prepare the Area:
1. Disconnect the power: Start by turning off the power to the existing garbage disposal unit at the circuit breaker.
2. Remove the old unit: Loosen the mounting ring and disconnect the drain pipes from the existing garbage disposal. Remove the old unit and thoroughly clean the area.
III. Install the New Garbage Disposal:
1. Mount the assembly: Attach the mounting hardware to the bottom of the new garbage disposal unit following the manufacturer’s instructions.
2. Apply plumber’s putty: Roll a small amount of plumber’s putty into a rope shape and place it around the sink flange. Press the flange into the sink drain opening to create a watertight seal.
3. Connect the mounting ring: Slide the mounting ring over the sink flange and secure it in place using the mounting screws. Ensure the assembly is centered and level.
4. Connect the drain pipes: Attach the discharge tube to the garbage disposal unit’s outlet, and connect the other end to the P-trap. Use a hacksaw to cut the pipe to the required length if necessary. Secure the connections with slip nuts and washers.
5. Electrical connections: If your new garbage disposal unit doesn’t come with a power cord, you’ll need to connect one. Follow the manufacturer’s instructions to wire the electrical cord and use wire connectors to secure the connections. Carefully tuck the wires into the disposal unit.
6. Test for leaks: Run water into the sink and check for any leaks around the drain pipes and the garbage disposal unit. Tighten the connections if needed.
IV. Final Steps:
1. Reconnect the power: Turn on the power to the garbage disposal unit at the circuit breaker.
2. Test the unit: Run water into the sink and turn on the garbage disposal to ensure it’s functioning properly. Check for any unusual noises or vibrations.
3. Maintenance tips: Remember to regularly clean your garbage disposal by grinding ice cubes and citrus peels to eliminate odors. Avoid disposing of hard objects or fibrous materials that may cause clogs or damage to the unit.
Conclusion:
By following these step-by-step instructions, you can successfully install a garbage disposal in your kitchen. It’s a relatively straightforward process that can provide you with added convenience and help maintain a clean and efficient kitchen environment. Enjoy the benefits of garbage disposal as you effortlessly dispose of food waste, making your kitchen chores a breeze.